



Solid bag rig
The go-anywhere solid bag rig is an absolute winner when you want a quick bite. By enclosing your lead, rig, and a small parcel of food inside a dissolvable PVA bag, it ensures your bait lands neatly on the bottom almost every single time.
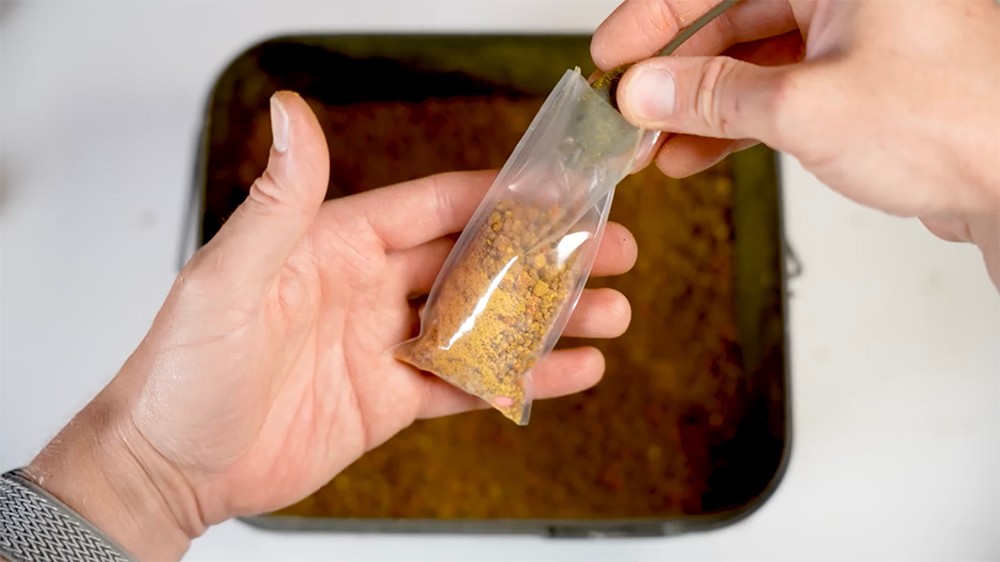
Solid bag rig – when and why
- When to use: It's a proven method whether you're fishing a small day-ticket run water or a big pit with warier carp. It is ideal when you're unsure of what the lake bed is like. Whether it’s silt, gravel, a clay bar, or light weed, you want a quick bite without feeding the fish up.
- Why it works: It delivers a tight, attractive parcel of small particles (like micro pellets or dust) with a small, high-vis or match-the-hatch hookbait presented perfectly right on top.
- Drawbacks to keep in mind: It can attract nuisance fish (like roach, bream, or tench) that blow the bait around. Because it uses a supple braid, an ejected bait can leave your hook tangled or masked in a heap, making it less ideal for long overnight waits where you can't verify if the rig has reset.
Solid bag: step-by-step guide
Tying the Rig Setup
- Cut your braid: Take 10 to 12 inches of supple braid (or strip the coating off a coated braid).
- Form the D-loop: Double over one end to form a small, tight loop, and pass it through the front of a size 4 or 6 curve shank hook eye.
- Attach the swivel: Slide a micro hook ring swivel onto the loop.
- Secure the D: Pass the loop over the body of the hook so the braid sits on both sides, forming a D-loop that can't slide past the bend of the hook.
- Knotless knot: Secure the D-loop with a 6-to-8-turn knotless knot, then trim the tag end.
- Add kickers and sleeves: Slide 2 cm of shrink tube over the eye/whippings, followed by a trimmed-down anti-tangle sleeve.
- Finish the end: Tie a figure-of-eight loop knot at the end (targeting a total rig length of 4 to 5 inches).
- Steam and bait: Steam the shrink tube to form an aggressive kicker. Thread baiting floss through the micro swivel, pull on an 11mm wafter, tie overhand knots to secure, and blob the floss ends with a lighter. Add a small blob of putty to the middle of the braid to pin it down once the bag dissolves.
Bagging Method 1 (Hookbait in the Corner)
- Position the bait: Place a 60 x 120mm PVA bag down and drop your hookbait right into the bottom corner.
- Add feed & lead: Fill the bag halfway with pellets, insert an 85g lead centrally for aerodynamics, and top off with more feed near the top.
- Compact: Pinch the top, pat the sides to compress the bait and squeeze out trapped air, then twist the top tightly.
- Seal: Wrap PVA tape around the twisted neck 3–4 times (lick-and-stick method) and trim the excess.
- Aerodynamics: Lick and stick the bottom corners of the bag inward, and poke a tiny air hole near the hookbait to release trapped air during sinking.
Bagging Method 2 (Side-by-Side Presentation)
- Fill halfway: Use a slightly larger 70 x 140mm bag and fill it halfway with pellets.
- Insert lead: Position your lead flat along one side of the bag.
- Insert hookbait: Lay the bag on its side, ease the hookbait into the middle space opposite the lead, and tip it upright.
- Seal and trim: Fill to the top with pellets, twist, tie with PVA tape, trim, and fold in the corners. (This method ensures the bag settles on the lake bed lead-bottom down and hookbait-up, acting like a method feeder.)
The simple hair rig – when and why
- When to use: It's the ultimate go-to when you're fishing a lake bed you aren't 100% sure about – especially if you spot fish activity (fizzing) but don't have solid bags ready and don't want to cast out a stiff boom.
- Why it works: It is simple, reliable, and uses a single continuous piece of supple braid from the lead loop down to the hair stop. The supple braid lets it settle gently on top of silt or weed (especially when paired with a 3-bait stringer or mesh bag).
- Key feature: The hair length gives crucial separation between the hook and the bait. When a fish sucks in and ejects the boilie, the silicone piece on the shank slides back, letting the bait blow out without immediately pulling the hook point out of position, giving the hook more time to drop into the fish's mouth. If you reel in and see the shank sleeve blown back, you know you've had a pickup!
Hair rig step by step guide
- Strip the coating: Cut 12 to 15 inches of semi-stiff coated braid and strip back roughly 4 inches of the outer coating using a stripper tool.
- Tie the hair loop: On the supple, stripped end, tie a small overhand loop knot for your hair stop and trim the tag.
- Mount the hookbait: Thread your boilie/hookbait onto a bait needle, transfer it to the hair loop, and fix it with a hair stop.
- Prepare shrink tube sleeves: Cut two pieces of shrink tube. One tiny piece to trap the hair on the shank, and a longer (~1.5 cm) piece for the eye kicker.
- Trap the hair: Thread the tiny shrink tube down the line, pass the point of a size 4 or 6 curve shank hook through it, and position it on the hook shank.
- Knotless knot: Thread the long end of the braid through the back of the hook eye, adjust your hair length (leaving a small gap below the bend), and wrap roughly 7 turns for a knotless knot. Pass back through the eye and pull tight.
- Pucker the coating: Tease the stripped section back about a centimeter into the coated section to create a "puckered" section.
- Add kicker & loop: Slide the longer shrink tube over the eye, slide on an anti-tangle sleeve, and tie a figure-of-eight loop knot at the top.
- Steam and balance: Wrap a small blob of tungsten putty around the puckered coating section. Steam the shrink tubing over a kettle to set the kicker.
Supple D Loop – when and why
- When to use: This is the primary go-to setup for fishing over clear, clean lake beds or leaving rigs out overnight.
- Why it works: It features unmatched resetting properties. Thanks to the stiff fluorocarbon boom (like a 5.5-inch Gemini Tidy Boom), if a fish picks up the bait and blows it out without getting hooked, the rig kicks straight back out and resets perfectly flat on the bottom instead of tangling.
- The Supple D-Loop Advantage: Standard Ronnie rigs attach the hook ring swivel directly to the shank. By using a supple braided D-loop on the shank instead, you gain extra movement and separation between the bait and hook when ejected.
- Bait options: Works fantastically with bottom baits, wafters, or snowmen. Adding a shot-on-the-hook boosts its turn speed and hooking power for wafters/bottom baits; simply remove the shot if you choose to fish it as a pop-up!
Supple D loop Ronnie: step-by-step guide
- Build the Supple D on Hook: Using 6 inches of supple braid, build a D-loop with a micro hook ring swivel on a size 4 or 6 curve shank hook, securing it via a knotless knot (the same process as the solid bag rig).
- Trim tag short: Trim the tag end so roughly 1 cm remains above the eye to prevent unraveling.
- Mount onto Boom: Cut a 1.5 cm piece of shrink tube and slide it over the hook eye. Take a fluorocarbon Ronnie boom (such as a 5.5" Gemini Tidy Boom) and pass the crook of the Ronnie swivel through the hook eye.
- Cover connection: Slide the shrink tube over the Ronnie swivel and hook whippings.
- Shrink: Wet the braid and use a jet lighter for localised heat to quickly shrink the tubing tight over the joint.
- Final touches: Crimped onto the bend of the hook, add an optional shot-on-the-hook for wafters. Add a tiny blob of putty over the fused loop on the boom, slide an anti-tangle sleeve onto the tail end, attach your bait via floss to the micro swivel, and you're ready to fish!
When it comes to carp fishing, you don't need a tackle box crammed with fifty different complicated setups. Once you find a few core rigs that you know work across different lake beds, you don't need to keep chopping and changing. Stick with proven rigs, pair them with bait you trust, focus on finding the fish, and you'll put more carp in the net this year!